Tuesday, May 31, 2011

Avian Mortality by Wind Turbines

Since the commissioning of early commercial; wind turbines, the idea of bird mortality by the blades of wind turbines has never settled. many biological researchers have protested the commissioning of large wind farms citing massive death of birds in future.

In this post we are going to explore this concept of death of birds due to wind turbines.


The Reality
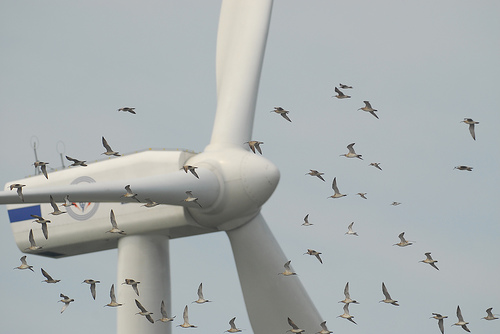
When a wind farm is installed in the path or a migratory route for birds, during the migrations the birds will come in contact with the large spinning blades and the result? Bird Mortality.
But on the other hand it us very uncommon for a wind farm to be cited in a migratory path since studies would have already revealed this in the early stages of planning.
 
"To help our understanding of turbine hazards to birds we'd like to make an analogy, to your bicycle. Turn your bike upside down or put it in a work rack, set it to the highest gear...the one you use to go fast on a level slope.... and now move the wheel slowly with your hand. The chain moves rapidly with only a few degrees of wheel rotation. This symbolizes today's cutting edge 1.5 mW turbines, which have a very large surface area of blade exposed to the wind and a gearbox that turns the dynamo quickly while the blades move slowly. Birds dodge these slow moving blades relatively easily.Now put the bike in the lowest gear...the one you use to climb hills...and move the wheel with your hand fast enough to turn the chain as fast as before. That symbolizes the 20-year-old "bird-o-matic" wind turbine design. Small blades with small surface areas have to turn rapidly to overcome the magnetic force of the dynamos, which generate electricity.Recapping: small blades, low surface area, lots of dead birds possible; very big blades, with large surface area exposed to wind, very few dead birds." From treehugger.com 

Tuesday, May 10, 2011

How to Rewind an Electric Motor [Part 1]

How to Rewind an Electric Motor

from wikiHow - The How to Manual That You Can Edit
Electric motors are relatively simple mechanical devices, but rewinding the coils on a DC motor is a precise task that should only be undertaken by those who with experience in mechanical or electrical repair. A mistake or poorly-performed rewind job will result in a motor that doesn’t work. At that point, your only options are to buy a new motor or to take it to a professional shop for repair. Given the variety of motors and types of windings, this can only be a general article on rewinding. If you don’t understand the terminology, you shouldn’t be rewinding a motor; once you start removing the original coils, there’s no going back.

Steps

  1. Clean your work surface to make sure it’s free of dirt and dust.
  2. Remove the motor housing to reveal the windings.
  3. Document the present configuration by taking notes or photographs. You may even wish to videotape your deconstruction so that you can precisely recreate the original winding pattern and connections.
  4. Take the wire from the tabs on the brush pads. Bend the tabs gently (and as little as possible) and completely remove the wire from the tabs before cutting the coils of the wind.
  5. Cut the coils in the wind free from the motor. The easiest place to cut is at the tops of the coils at the top of the armature. Count the number of winds in each coil so that you can rebuild the motor to its original configuration.
  6. Check the insulation revealed before you rewind an electric motor. If it’s in good shape, you can put it back in place before beginning your rewind. You can replace burned or damaged insulation with similar material or insulating tape.